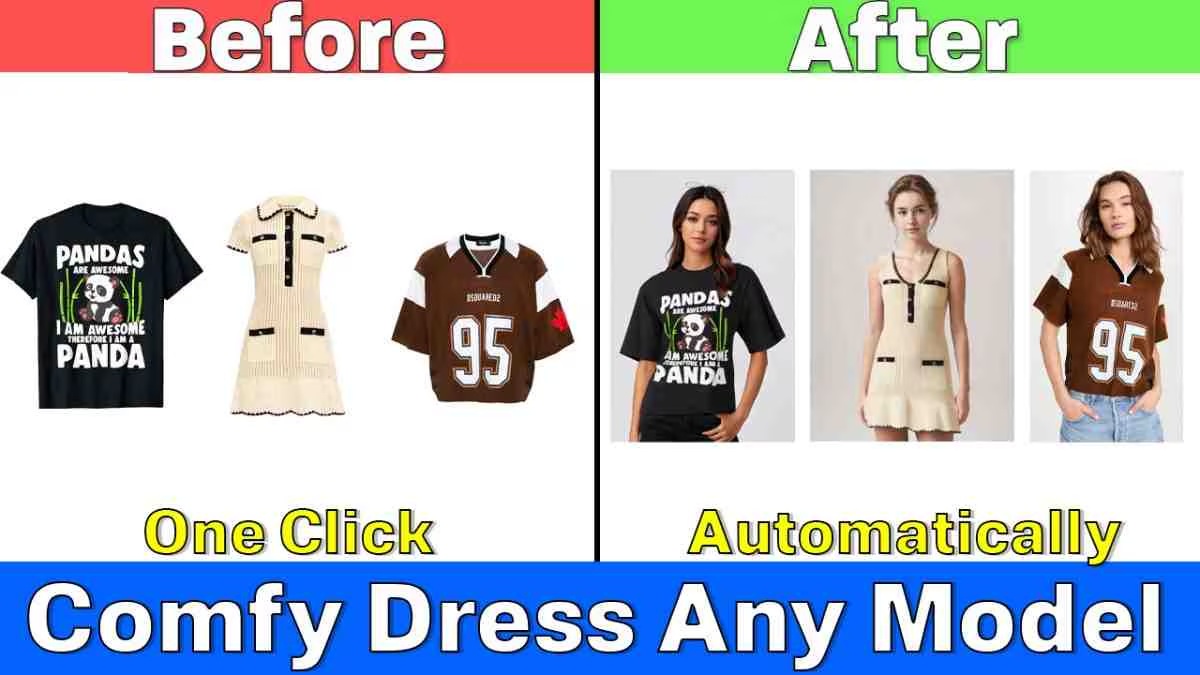
Welcome back! Today, we’re diving into the exciting world of CATVITON, where you can change outfits on any model effortlessly. Whether it’s a dress, t-shirt, or anything in between, CATVITON makes it easy to dress up your figures just the way you want. So, let’s roll up our sleeves and get started!
What is CATVITON?
CATVITON is a fantastic tool that lets you virtually dress models in different outfits. Imagine having a wardrobe where every item is at your fingertips. That’s exactly what CATVITON does! You can swap out t-shirts, dresses, and more on any model you choose. It’s like playing dress-up, but way cooler!
Getting Started with CATVITON
To change outfits using CATVITON, you’ll need to set it up first. Don’t worry; I’ll walk you through it step by step. Here’s how to get started:
- Download CATVITON: Start by downloading the CATVITON tool from the official site. You’ll find all the necessary files there.
- Install the Tool: Once downloaded, follow the installation instructions. This usually involves running a setup file. If you encounter any issues, check the README file that comes with it for guidance.
- Gather Your Models: You’ll need images of the models you want to dress. These can be figures, illustrations, or even photos. Just ensure they’re clear and suitable for the outfits you plan to use.
- Collect Outfits: Next, gather the outfit images you want to use. Whether it’s t-shirts, dresses, or accessories, make sure they’re in a compatible format like PNG or JPEG.
How to Change Outfits Using CATVITON
Now, let’s get into the fun part—changing outfits! Follow these simple steps:
- Open CATVITON: Launch the CATVITON application. You should see a user-friendly interface that’s easy to navigate.
- Load Your Model: Click on the “Upload Model” button. Select the model image you want to dress. Once it’s uploaded, you’ll see it displayed on the screen.
- Choose Your Outfit: Next, it’s time to pick an outfit! Click on the “Upload Outfit” button and select the outfit image you want to use.
- Position the Outfit: You might need to adjust the size and position of the outfit to fit the model correctly. Use the tools provided to scale or rotate the outfit. This step is crucial for a realistic look.
- Masking Areas: If you want to change only a specific area, like the shirt or pants, use the masking tool. This allows you to select which parts of the model will display the new outfit.
- Apply Changes: Once you’re satisfied with the adjustments, click the “Apply” button. The magic happens here! You’ll see the model dressed in the new outfit in real time.
- Save Your Work: Don’t forget to save your creation. You can usually do this by clicking the “Save” button, ensuring you keep all your hard work intact.
Tips for Best Results
- Use Clear Images: The better quality your images, the more realistic your final product will look. Avoid blurry or pixelated outfits.
- Experiment with Different Outfits: Don’t hesitate to mix and match! Try different combinations to see what looks best.
- Be Patient with Positioning: It might take a few tries to get the outfit just right on the model. Take your time!
Resorces
CatVTON Wrapper Node:
https://github.com/chflame163/ComfyUI_CatVTON_Wrapper
CatVTON Wrapper Models: https://drive.google.com/drive/folders/1TJNNql7UfDPVgHJuItDDjowycN5jpC5o?usp=sharing


