“I want to change the expression of my photos” or “I want to make my illustrations look more realistic like paintings”…
Image-to-Image can make that happen!
Hello,
” ComfyUI Master Guide ” will finally enter the “Image-to-Image” section from this issue.
In this article, we will take a practical step-by-step guide to explaining how to use ComfyUI to create i2i, from the basics to the advanced.
1. What is Image-to-Image ?
Image-to-Image is a technique that uses an existing image as input to generate a new image, preserving the structure and characteristics of the original image while adding new elements and changing the style.
Image-to-Image in ComfyUI uses many of the same nodes as regular image generation, with the main difference being that it uses existing images as input. This technique can be used for a wide range of purposes, such as editing or retouching photos, converting art styles, changing character designs, modifying or enhancing landscape paintings, and more.
This time, we will explain how to change facial expressions by inpainting and how to convert the style from anime to realistic.
2. Changing facial expressions by inpainting
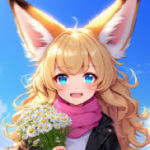
Now, let’s actually build an Image-to-Image workflow with ComfyUI. This time, I want to change the expression of the following image.

- A PNG image (not webp format) with the workflow embedded and the ComfyUI i2i notebook in Google Colab are provided at the end of this article.
- Click “Load Default” in the menu to load the standard workflow. The model used is ” stable-diffusion-xl-base-1.0 ” .

- Next, add a “Load Image” node and upload the target image from “choose file to upload” .

- Right-click on the widget and click “Open in MaskEditor” from the menu that appears .

- A canvas will appear where you can specify the mask area.

- This time, I want to change the expression, so I’ll fill in the face with a brush.
- “Thickness”, “Opacity” and “Color” are working parameters. They do not affect the final image.
- Then click “Save to node” .

- The face will be masked as follows:

- Next, add the “VAE Encode (for inpainting)” node.
- Connect the outputs “IMAGE” and “MASK” of “Load Image” to the inputs “pixels” and “mask” of the “VAE Encode (for inpainting)” node , respectively .
- Connect the output “VAE” of the “Load Checkpoint” node to the input “vae” of the “VAE Encode (for inpainting)” node .

- Delete the “Empty Latent Image” node.

- Connect the output “LATENT” of the “VAE Encode (for inpainting)” node to the input “latent_image” of the “KSampler” node .

- Change the positive prompt to “1girl, smile.”

- Now click “Queue Prompt” to generate the character. The generated result is shown below. The facial expression has changed, but it doesn’t blend in well with the surroundings.

- To adjust the generated results, adjust the “denoise” value of the “KSampler” node . You can adjust the degree of change by lowering this value from 1.0 to 0.9, 0.8, …

denoise = 0.8

denoise = 0.75

*If you set this parameter below 0.8, the game will easily break down, so we recommend setting it in stages.
If you want finer control, you can also manipulate the VAE Encode (for Inpainting) parameter “grow_mask_by”.
Setting “grow_mask_by” to a smaller value will make the border more noticeable.


Conversely, if you set “grow_mask_by” to a large value, the boundaries will become fuzzy. The maximum value is 64. Increasing the value will increase the processing time.
denoise = 0.9, grow_mask_by = 64, seed = 1

Let’s generate a batch:
denoise = 0.9, grow_mask_by = 64, seed = 5

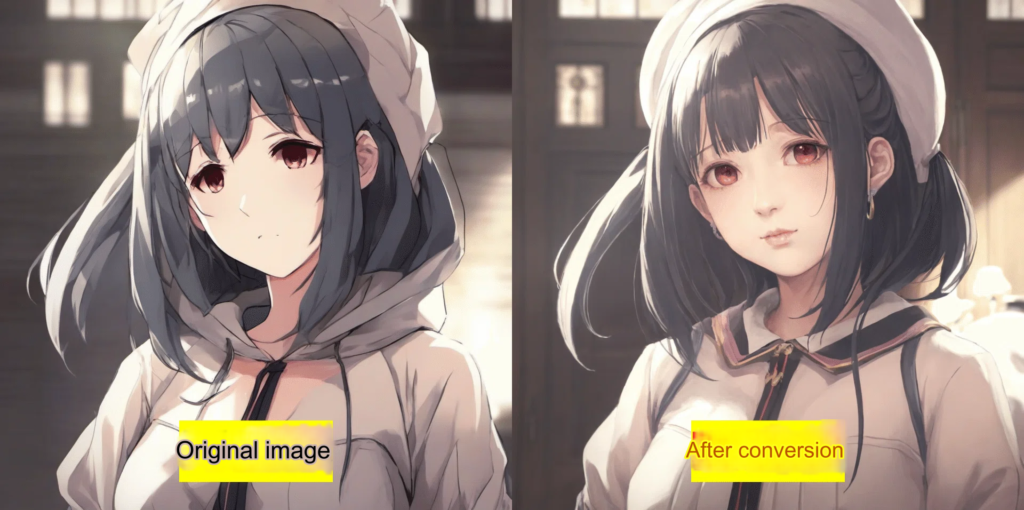
3. Style conversion from anime to realistic
Using the previous workflow, we will convert the style from anime to realistic. The changes in the workflow are as follows:
- Remove the mask from the face. This is because we are changing the style this time, so we want to target the entire image. To remove the mask, open the canvas for the mask with “Open in MaskEditor” , click “Clear” at the bottom left, delete the mask, and then click “Save to node” .

- Change the “VAE Encode (for inpainting)” node to a “VAE Encode” node , which is a version of the “VAE Encode (for inpainting)” node with the mask input removed.

- Change the model to be used to ” RealVisXL_V4.0.safetensors “ . RealVisXL is a model that excels at depicting realistic images, and by using this, we can convert it into a realistic style. Download RealVisXL from the link below and store it in the “ComfyUI/models/checkpoints” folder.
If you have already downloaded it, just select it.
RealVisXL_V4.0.safetensors · SG161222/RealVisXL_V4.0 at mainWe’re on a journey to advance and democratize artificial intelligencehuggingface.co
- Set the positive prompt to “1girl”. Since the facial expression will not change, delete “smile”.

- Set the “denoise” of the “KSampler” node to around 0.55-0.70. Adjust this while checking the generated results.

- Let’s generate an image using the settings above. Below is the generated result. You can see that the style has changed from the original image.
4. Ethical Considerations
The use of i2i requires ethical considerations:
- Copyright : Do not use other people’s work without permission. In particular, lowering the denoise too much will result in intentional infringement of reliance or similarity.
- Privacy : Be careful with personally identifiable images
- Misinformation : Avoid creating misleading images, such as fake images or deepfakes
- Inappropriate Content : Refrain from generating harmful or offensive imagery.
Image-generating AI is the responsibility of the creators, so it is important to use it responsibly and strike a balance between creativity and ethics.
5. Summary
ComfyUI’s Image-to-Image technology is a tool that greatly expands your creative possibilities. Starting from building a basic workflow, fine-tuning parameters, and applying advanced techniques, you can gradually hone your skills to produce more impressive and original images.
Finally, creative activities using AI also require ethical considerations: be careful about copyrights and personal information, and use AI responsibly.
We hope you will use this article as a reference and enjoy exploring Image-to-Image with ComfyUI. New discoveries and wonderful creative journeys await you!